The eCommerce landscape is rapidly evolving, making it easier for shop owners to manage their businesses due to advancements in technology and the ability to connect globally. If you’re running a WooCommerce store and looking to expand its capabilities, migrating to Shopify could be a beneficial move.
Switching platforms comes with numerous advantages, and there’s no need to hesitate when transferring your orders, products, customers, and other data from WooCommerce to Shopify. This guide will walk you through the straightforward process of WooCommerce to Shopify migration.
Benefits of Moving From WooCommerce to Shopify

Before diving into the migration steps, let’s explore the advantages of making this switch. Understanding these benefits will help you prioritize what aspects of your store to focus on during the transition. Shopify design and development services provide invaluable assistance in the Woocommerce to Shopify Migration, ensuring a seamless transition for clients. Here are key reasons to consider moving from WooCommerce to Shopify:
Simple to Use
If you find WooCommerce challenging, Shopify might be a more user-friendly alternative. It’s designed with simplicity in mind, making it easier to set up and manage than WooCommerce. Shopify allows you to create your website using pre-designed themes and an intuitive drag-and-drop interface.
More Trustworthy
WooCommerce is a self-hosted platform, which means you’re responsible for maintaining your store’s uptime and security. If managing these aspects seems daunting, Shopify is an excellent alternative when it comes to ecommerce platforms. Its hosted nature alleviates the burden of store maintenance, a reason many users migrate from platforms like PrestaShop or Weebly to Shopify.
Stronger Safety Measures
As previously mentioned, Shopify is a hosted platform that offers enterprise-level security. This type of security is crucial for protecting large businesses from data breaches. Features include automatic data backups, compliance with credit card payment regulations, firewalls, intrusion detection systems, and robust data protection measures.
Compliance with PCI standards is essential for eCommerce stores that process credit card payments. Shopify’s adherence to these standards ensures you can accept payments securely without the added stress of safeguarding customer data.
Works Faster
Speed is critical for online stores, as it directly influences customer purchase decisions. Shopify is known for its speed and robust infrastructure, capable of handling high traffic volumes smoothly. This ensures an excellent shopping experience for your customers, potentially boosting sales.
More Features
Shopify offers a broader range of features compared to WooCommerce. It comes equipped with all the necessary tools for running a successful online shop, including a blog platform, abandoned cart recovery, and multilingual support. These features enhance the functionality and reach of your online store.
Grow and Handle More Business
As your business expands, the ability to scale your store becomes crucial. Shopify is one of the most well-suited ecommerce platforms for startups and growing businesses, offering scalability that WooCommerce might struggle with when it comes to handling larger operations.
Things to do Before Moving From WooCommerce to Shopify
Backup Your WooCommerce Data
The most critical step before initiating the migration is to back up your WooCommerce data. Ensure you have copies of all vital information, such as product details, customer data, and order history. This step is crucial, even when using migration tools like Cart2Cart for transitioning from Magento to Shopify.
There are several methods to back up your data, but the easiest is using plugins like BackupBuddy or UpdraftPlus. These tools create a backup of your website, which can be stored on your computer or in cloud storage. With a backup in place, you’ll have peace of mind knowing that your data is safe if any issues arise during the migration.
Create Your Shopify Store
After securing your data backup, the next step is to set up your Shopify store. This involves creating your account, selecting a theme, and installing necessary apps.
Account Creation

To create a Shopify account, follow these steps:
- Visit Shopify’s website.
- Click on the “Start free trial” button to initiate the trial.
- Enter your email address, create a password, and name your store.
- Choose your country and the currency you’ll be using.
- Click on “Create your store.”
- Once completed, you’ll be directed to your Shopify admin panel, where you can start configuring your store.
Theme Selection
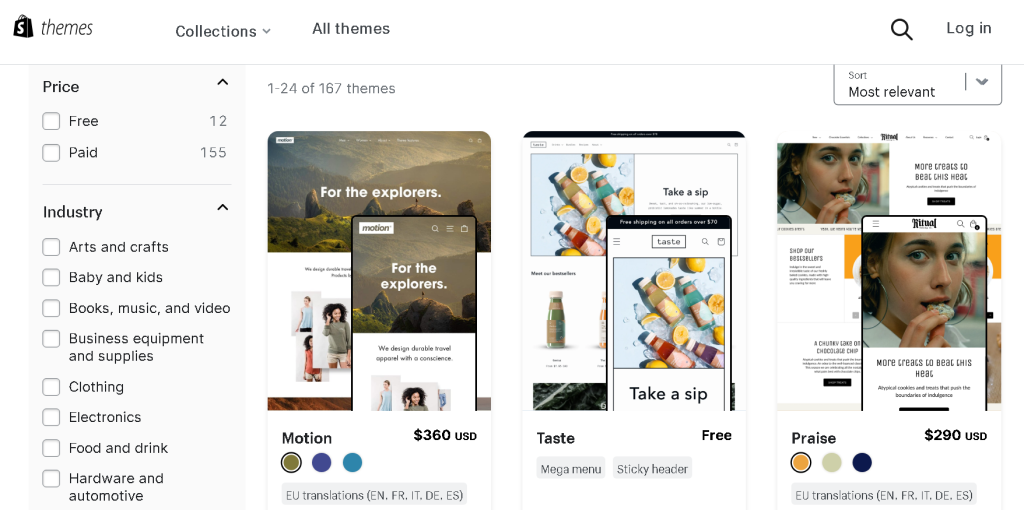
Choosing the right theme is a crucial step in setting up your Shopify store. With an extensive range of both free and paid themes available on Shopify, you’re sure to find one that aligns with your brand’s aesthetic and functional requirements. Here’s how to select a theme:
- Access your Shopify Admin.
- Click on the “Online Store” section.
- Select the “Themes” option.
- Browse through the available themes and pick one that aligns with your vision.
- Click on the “Add to theme library” to install your chosen theme.
For a seamless transition, it’s advisable to select a Shopify theme that closely resembles your existing WooCommerce site. This maintains brand consistency while offering the opportunity to introduce new features and give your store a unique and refreshed look.
App Installation

With your Shopify account set up and your theme selected, the next step is to enhance your store with apps. Shopify’s App Store is filled with various plugins and tools that can significantly augment your store’s functionality. Here’s how to add apps:
- Navigate to the “Apps” section in your Shopify admin.
- Explore the wide array of available apps in the Shopify App Store.
- When you find an app that meets your needs, click on the “Add app” button.
- Follow the prompts to install the app.
Shopify will automatically integrate the app into your store, making it available for immediate use. This process allows you to customize your store with features that cater to your specific business needs and enhance your customers’ shopping experience.
Also Read: 20 Best Free & Paid Shopify SEO Apps in 2025
Steps for Migration From WooCommerce to Shopify
Migrating from WooCommerce to Shopify can be approached in different ways. Here, we outline three straightforward methods. Choose the one that best suits your store’s needs or the one you find most manageable.
Manual Migration
Manually migrating from WooCommerce to Shopify is an option. While this method can be time-consuming, it doesn’t incur any additional costs and is fairly straightforward. Here are the steps involved:
Step 1: Before Migration
Preparing for migration involves determining the types of data you’ll transfer to Shopify. Essential data types include:
Products: Includes the manufacturer, availability status, name, Stock Keeping Unit (SKU), detailed description, product tags, SEO title, inventory management details, and images.
Variants: Differ in price, weight, SKU, and quantity.
Categories: Consist of an image, a short description, a title, a detailed description, and a name.
Customers: First and last names, email addresses.
Shipping Address: Address, company name, state, city, ZIP code, country.
Billing Address: ZIP code, country, state, city, company name, address, first and last name.
Orders: Shipping costs, discount amounts, any comments on the order, tax amount, product costs, quantity of items, selected options, unique product identifiers, product names.
Others: Discounts, customer reviews, web pages, blog posts.
Step 2: Transfer WooCommerce’s Data
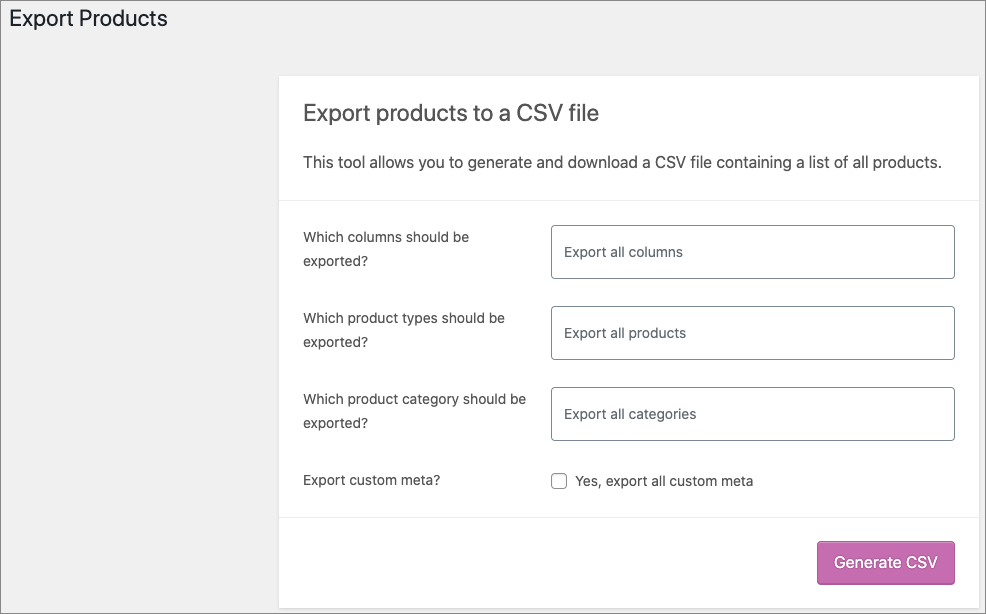
Export your data from WooCommerce to Shopify, including products, orders, and customer information. In WordPress, go to the “Admin Panel” and select the “Products” section. A new window will appear, where you can select the types of products, specific categories, or columns to export.

To customize your export, leave certain fields blank or add specific information to export using selected categories. Then, click the “Generate CSV” button to obtain the CSV file containing your data. This file is crucial for the next stage of the migration process.
Step 3: Import Products from WooCommerce
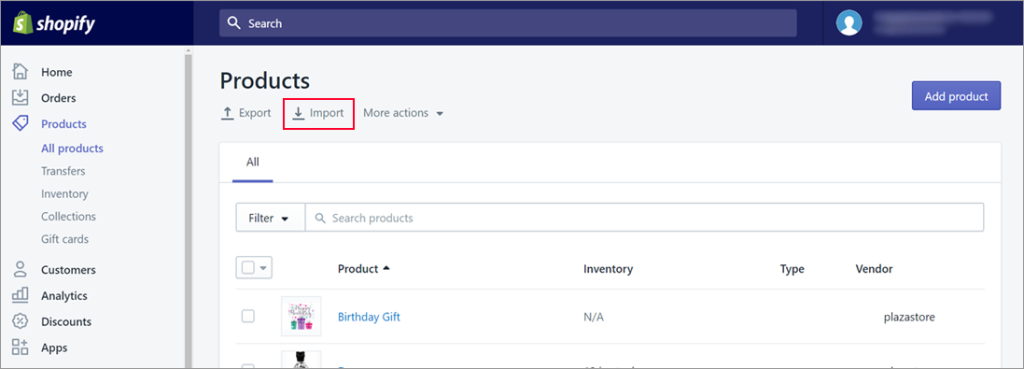
To begin the import process, navigate to the “All Products” list in your Shopify admin and click on the “Import” button.
Then, upload the CSV file you downloaded from WooCommerce by selecting it and clicking on “Start Import.”
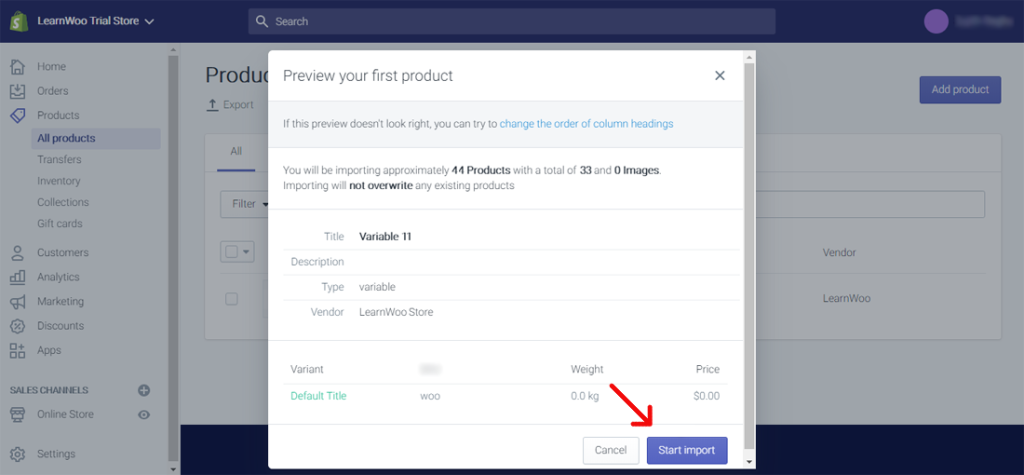
During this process, the Shopify Importer will add the products from the CSV file to your online store. This step might take some time to complete. After the import is finished, you’ll see the products listed in your Shopify store.
Note that product images are not transferred with the CSV file. To remedy this, upload your product images to Shopify’s file pages. Each image will automatically receive a web address. For bulk image uploads, place the URLs on separate lines in the CSV file.
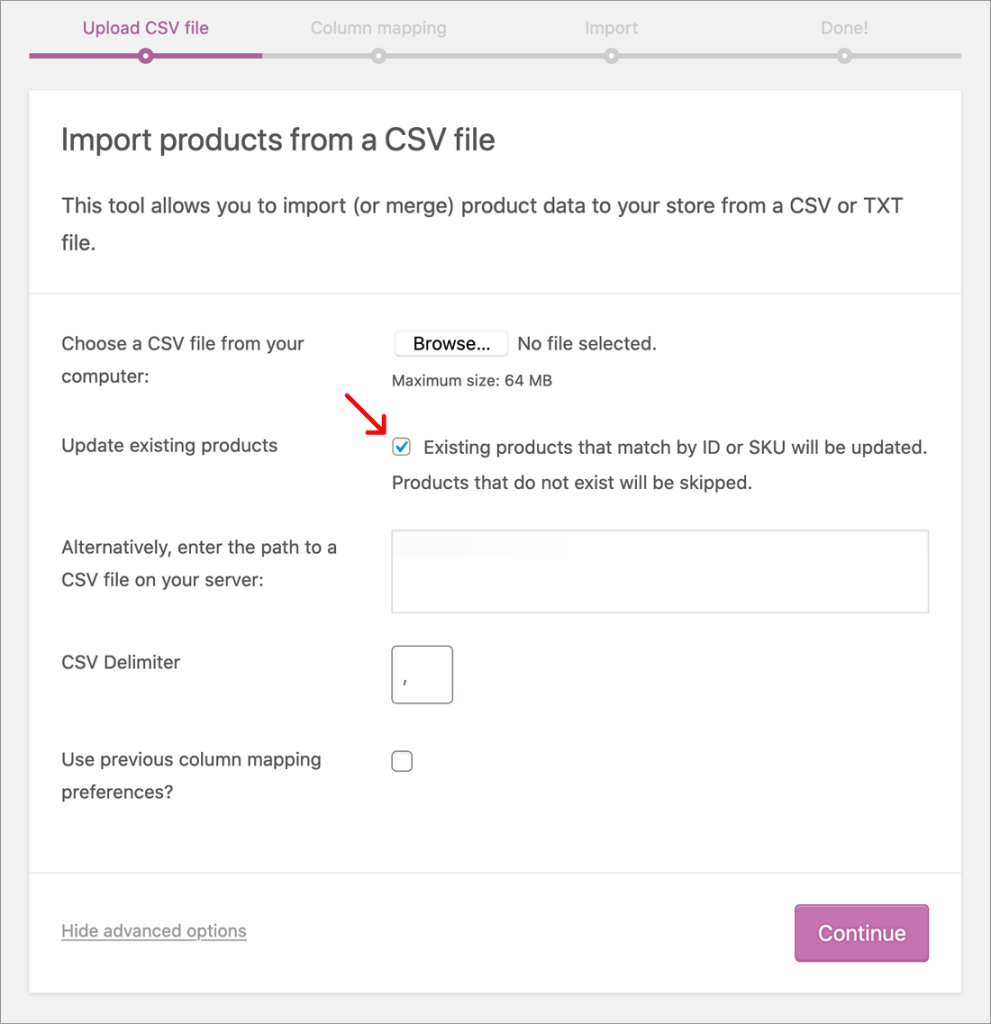
After importing products, follow a similar process to import orders and customer data. Be aware that manual migration has limitations, such as the inability to import product images in bulk and potential omissions of some products or customers. Additionally, duplicate customer entries might lead to only the most recent entry being imported. For digital products, you may need to install Shopify’s free app to enable their functionality.
If manual migration seems challenging, you can explore other methods or use migration apps for a smoother process.
Migration Using an Import App
The “Store Importer” app from Shopify can facilitate the transfer of customer and product data from WooCommerce to Shopify. Remember to back up your data before initiating any migration process.
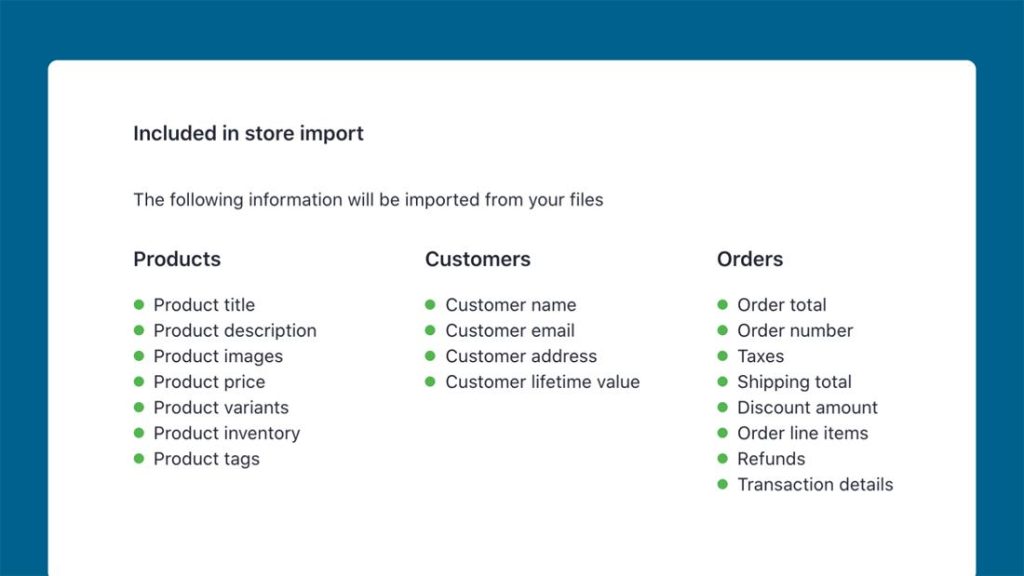
Step 1: Transfer Data From WooCommerce
First, export your WooCommerce store’s data. This process will save a single XML file on your computer containing all the information from your WooCommerce store that can be later imported into Shopify.
In your WooCommerce admin, select “Tools” and then “Export”. Choose “All content” and click on “Download Export File” to save the data.
Step 2: Transfer the Data to Shopify
After exporting your WooCommerce data, it’s time to import it into Shopify. Note that “Store Importer” works best with the “All content” XML file. If you don’t have an XML file, consider using a third-party product import app.
In your Shopify admin, go to “Apps” and navigate to the “Import your data into Shopify” page. Select “WooCommerce” from the drop-down menu, then proceed to the “Upload files” section and click “Add file”. Choose the files you wish to import.

When importing products, ensure to include these files for the Default templates and the Bulk Edit templates to import them correctly. Alternatively, you can choose the XML file you downloaded earlier. After selecting your files, click on “Continue Import” and then choose “Import” to begin the process.
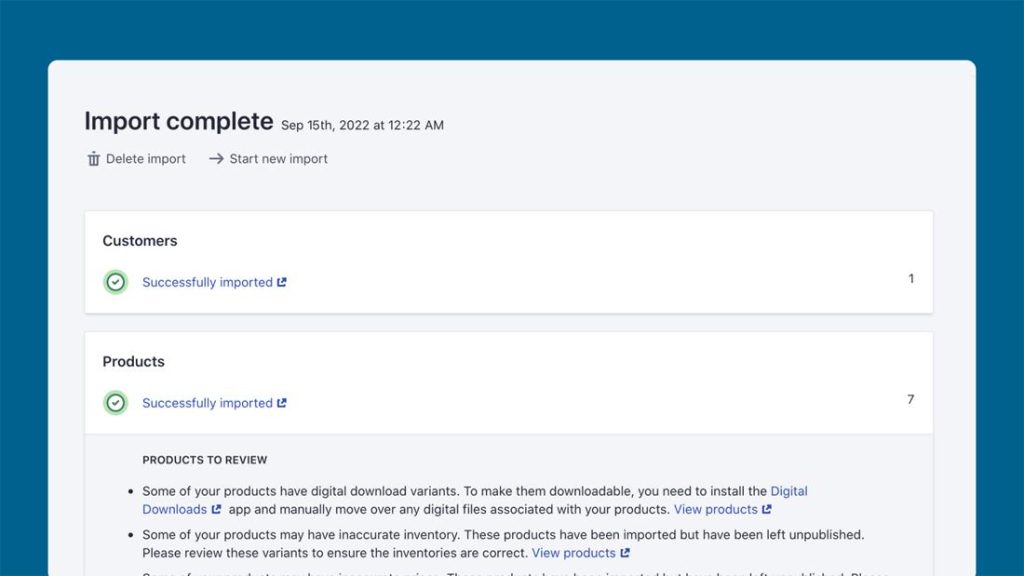
Step 3: Review and Update Imported Data
This crucial step ensures the success of your migration process. After successfully importing your data into Shopify, it’s important to verify that all product and customer information has been transferred correctly. If you notice any missing information, you can manually add it at this stage. Reviewing and updating your data after importation allows you to add any missed customer or product details manually.
Get Help From an Expert
If the prospect of migrating from WooCommerce to Shopify seems daunting, consider seeking assistance from a migration expert or specialist. Utilizing Shopify Migration Services is a recommended option for those who prefer professional assistance. Opting for expert help can alleviate stress, as a proficient team will manage your store’s transition smoothly and efficiently.
Shopify Migration Services experts provide not only technical support but also valuable advice for your store’s transition. They ensure a seamless and successful migration to the new system. Trusting these professionals can also be beneficial for post-migration tasks such as setting up SEO redirects and managing your new store.
While seeking professional guidance might require an investment of time and money, the expertise and reliability offered by specialists often make it a worthwhile choice. Attempting to migrate on your own could lead to time-consuming errors and complications. Hence, consulting experienced experts from the beginning is advisable.
Also Read: How to Promote Shopify Store: 5 Easy Steps
Extensions for Migrating From WooCommerce to Shopify
Several extensions are available to assist with the migration process. If you prefer using extensions for migration, here are the top three recommended ones to help transfer your data from WooCommerce to Shopify:
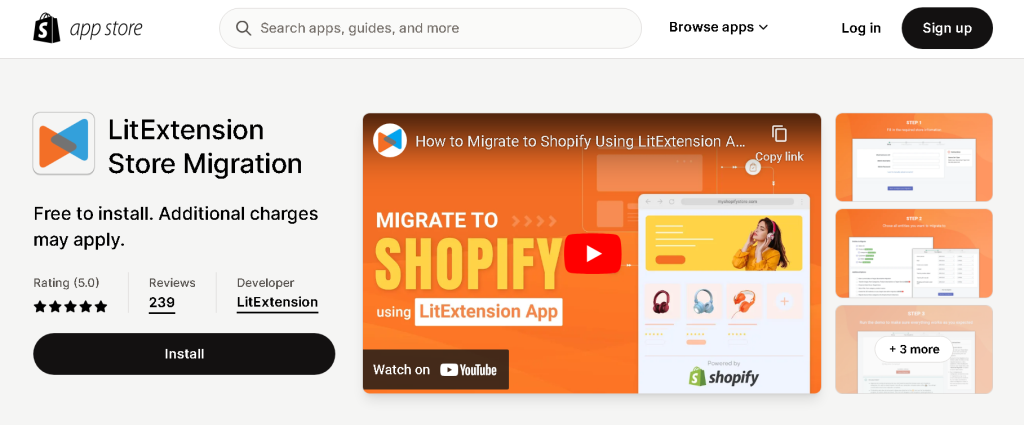
LitExtension Store Migration
LitExtension is an efficient solution for transferring all your customer data, orders, and products from WooCommerce to Shopify. This extension is particularly useful if you’re pressed for time or lack technical expertise in conducting migrations.
Features
- Offers comprehensive, one-stop services for a smooth migration process.
- Provides high-quality migration services at an affordable cost.
- Facilitates a quick and customizable transition from WooCommerce to Shopify.
- Saves time and simplifies migration tasks.
- Supports a dedicated and responsive customer service team, accessible via email, chat, phone, or support ticket for any assistance needed during the migration.
Pricing
- Begins at $89
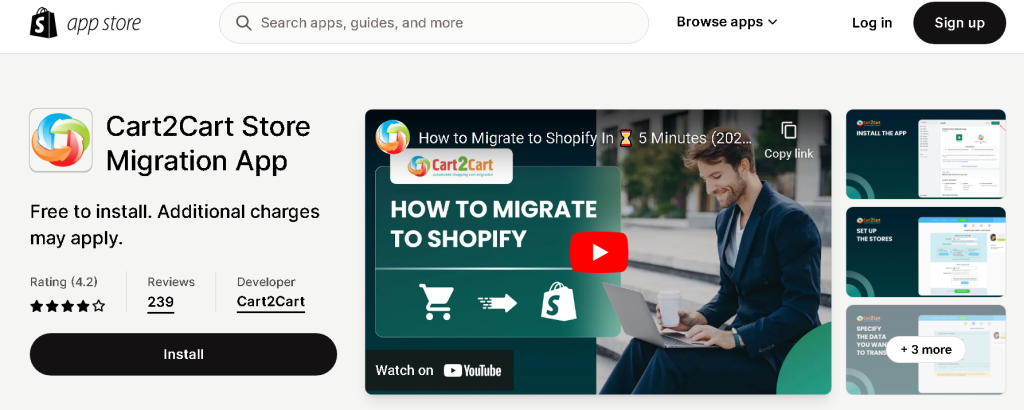
Cart2Cart Store Migration App
Cart2Cart simplifies the migration process, making it a popular choice for transferring your online store from WooCommerce to Shopify. This tool enables you to import products, customers, and orders without requiring any programming skills, ensuring a smooth and error-free data transfer.
Features
- Ensures accurate and speedy data transfer.
- Reliable, with a proven track record and a convenient cost calculator.
- Provides excellent customer service throughout the migration process.
- Offers step-by-step guidance for moving data between platforms.
- Competitive pricing with access to expert assistance.
Pricing
- Begins at $69
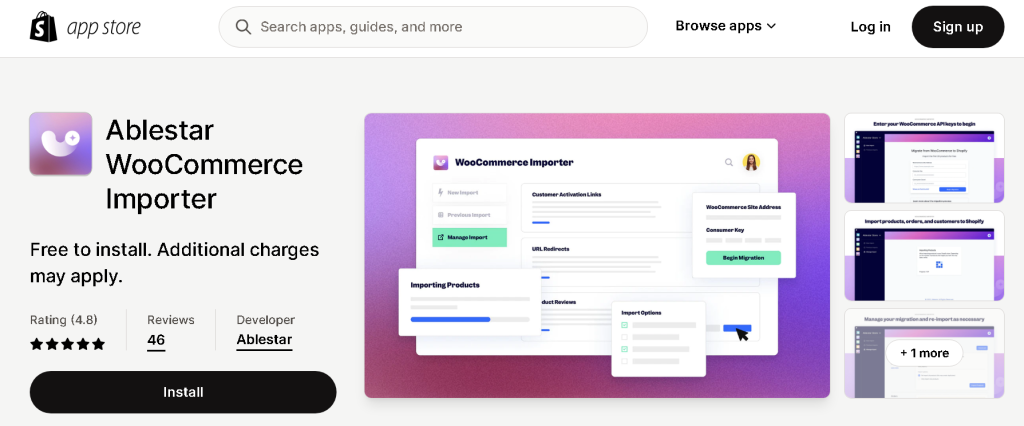
Ablestar WooCommerce Importer
The Ablestar WooCommerce Importer is a valuable tool for efficiently transferring your orders and products from WooCommerce to Shopify. It’s an ideal solution for those looking to test a new platform or shift their store to Shopify. The tool also facilitates the creation of activation links for customer accounts and manages URL redirects to address broken links during the transition to Shopify.
Features
- Facilitates the easy import of various product types, including images, descriptions, and categories.
- Enables the transfer of customer information to Shopify while preserving their historical order data.
- Allows the export of customer product reviews.
- Known for its quick and efficient service.
Pricing
- Begins at $49.99
Correcting Mistakes During WooCommerce to Shopify Migration
Failed to Import a Few Customers and Products
This issue often arises due to incorrect data in the WooCommerce CSV file. To resolve this, you will need to manually add any missing products and customers to your Shopify store. Here’s how to do it:
Adding Missing Products:
- Access the Shopify admin panel and click on “Products.”
- Click on “Add product.”
- Enter the product details and then click on the “Save” button.
Repeat these steps for each product that was not successfully imported.
Adding Missing Customers:
- In the Shopify admin, navigate to the “Customers” tab.
- Click on the “Add customer” button.
- Enter the customer’s details and then click “Save.”
Repeat this process for each customer that failed to import.
By following these steps, you can ensure that all necessary data is accurately transferred from WooCommerce to Shopify, maintaining the integrity and continuity of your online store.
Also Read: Product Page SEO: The Missing Link in Your E-commerce Strategy
Failed to Import Bundled Products
Bundled products, which are items sold together as a set (like a shirt and pants combo), can sometimes pose challenges during the migration process. If you have such grouped items in WooCommerce, they might not transfer seamlessly to Shopify. Here’s how to address this issue:
- Visit the Shopify App Store and find a suitable product bundle app.
- Download and install the app on your Shopify store.
- Follow the app’s instructions to recreate your bundled products within Shopify.
By using a dedicated app, you can effectively manage and offer bundled product sets, similar to how they were presented in WooCommerce.
Failed to Publish Imported Products
Sometimes, products imported into Shopify may not be immediately visible on your store because they were imported as hidden items. To make these products available to your customers, you’ll need to manually set them to be visible.
- In your Shopify admin panel, go to the “Products” section.
- Select the product you wish to modify.
- Navigate to the “Visibility” section and find the “Search engine listing preview.”
- Change the visibility setting to “Show.”
- Save your changes to update the product’s status.
Repeat these steps for each product that was imported but not published. This will ensure all your products are visible and available for sale on your Shopify store.
Failed to Import Product Variants
Product variants, which represent different options for a product, such as size or color, can sometimes be problematic during the migration process. If your product variants did not import correctly and were instead treated as separate products, you’ll need to manually configure them.
- In the Shopify admin panel, click on “Products.”
- Select the product you need to add variants to.
- Under the “Variants” section, click on “Add variant.”
- Enter the details for each variant, then click the “Save” button.
Repeat these steps for each product that requires variant information to be added.
Failed to Import Product Dimensions
If your imported products are missing dimension information, it’s likely that this data was not included in the WooCommerce CSV file. To add dimensions to your products:
- Access Shopify’s admin panel and select “Products.”
- Choose a product to edit.
- Scroll down to find the “Dimensions” section.
- Enter the dimensions (height, width, length) of the product, then click “Save.”
Ensure to repeat this for each product missing dimension information.
Failed to Publish Digital Products
In case you encounter issues with digital products not appearing post-migration, you’ll need to utilize Shopify’s Digital Downloads app. This app enables you to manage and sell digital products on your Shopify store.
- In the Shopify admin, navigate to “Products.”
- Select the digital product you want to modify.
- In the “Digital Downloads” section, click on “Add digital download.”
- Input the necessary details about the digital product and click “Save.”
This process will enable you to effectively manage and sell digital products on your Shopify store, ensuring they are available to your customers.
Tags for Imported Products
When utilizing the “Store Importer” app, tags will automatically be assigned to your imported products. These tags are useful for categorizing and managing your inventory and can make modifications more manageable. The format for tags in each imported record is **import__**, with variations depending on the source of your data.
While retaining these tags on your imported products is an option, be mindful of potential issues in using them for store organization. Your customers could inadvertently come across these tags, which might not align with your desired storefront presentation. To avoid this, consider removing these tags after you’ve completed your post-import review and corrections.
Final Thoughts
Both WooCommerce and Shopify are viable platforms for running an online store. While WooCommerce caters to those with technical expertise, Shopify is more user-friendly, particularly for those with limited technical background, facilitating easy store management. Opting for Shopify can enhance the user experience of your online business. If you’re considering a platform change for your store’s growth, don’t hesitate to transition to Shopify.
Migrating from WooCommerce to Shopify is simpler than it may seem. By following the guidelines in this post, you can smoothly transition your store. Before migrating, assess your current sales, familiarize yourself with Shopify, and understand the limitations and capabilities of both Shopify and WooCommerce. With a clear migration plan in place, use this guide to support your transition.
FAQs
Can customer passwords be transferred from WooCommerce to Shopify?
It’s not possible to transfer customer passwords from WooCommerce to Shopify due to different security protocols. You can address this by informing your customers to reset their passwords on your new Shopify store.
How can I delete imported data from Shopify?
If you’re unsatisfied with the imported data, you can delete it and start over. Navigate to the “Imports Complete” page in Shopify and click the “Delete” button corresponding to the import you wish to remove. This will erase all imported data, including products, customers, and orders.
Why should I switch from WooCommerce to Shopify?
Shopify is known for its user-friendly interface and robust features scalable to your business needs. If you’re seeking an efficient and straightforward online selling platform, Shopify is often preferred due to its excellent support and ease of use. Moreover, technical expertise is not a prerequisite for migrating to or managing a Shopify store.
Will migrating to Shopify affect my website’s SEO?
With careful planning and execution, the impact on SEO can be minimized. Implement 301 redirects for product pages, update metadata, and notify search engines of the changes. Utilize Shopify’s SEO tools and guidance to ensure your store remains visible online post-migration.
